Community for Kel-Tec Shooters banner

60 round CMR & PMR 3D2A / FOSSCAD mags

2 reading
3.5K views 17 replies 5 participants last post by  CMR50Modder  
#1 · (Edited)
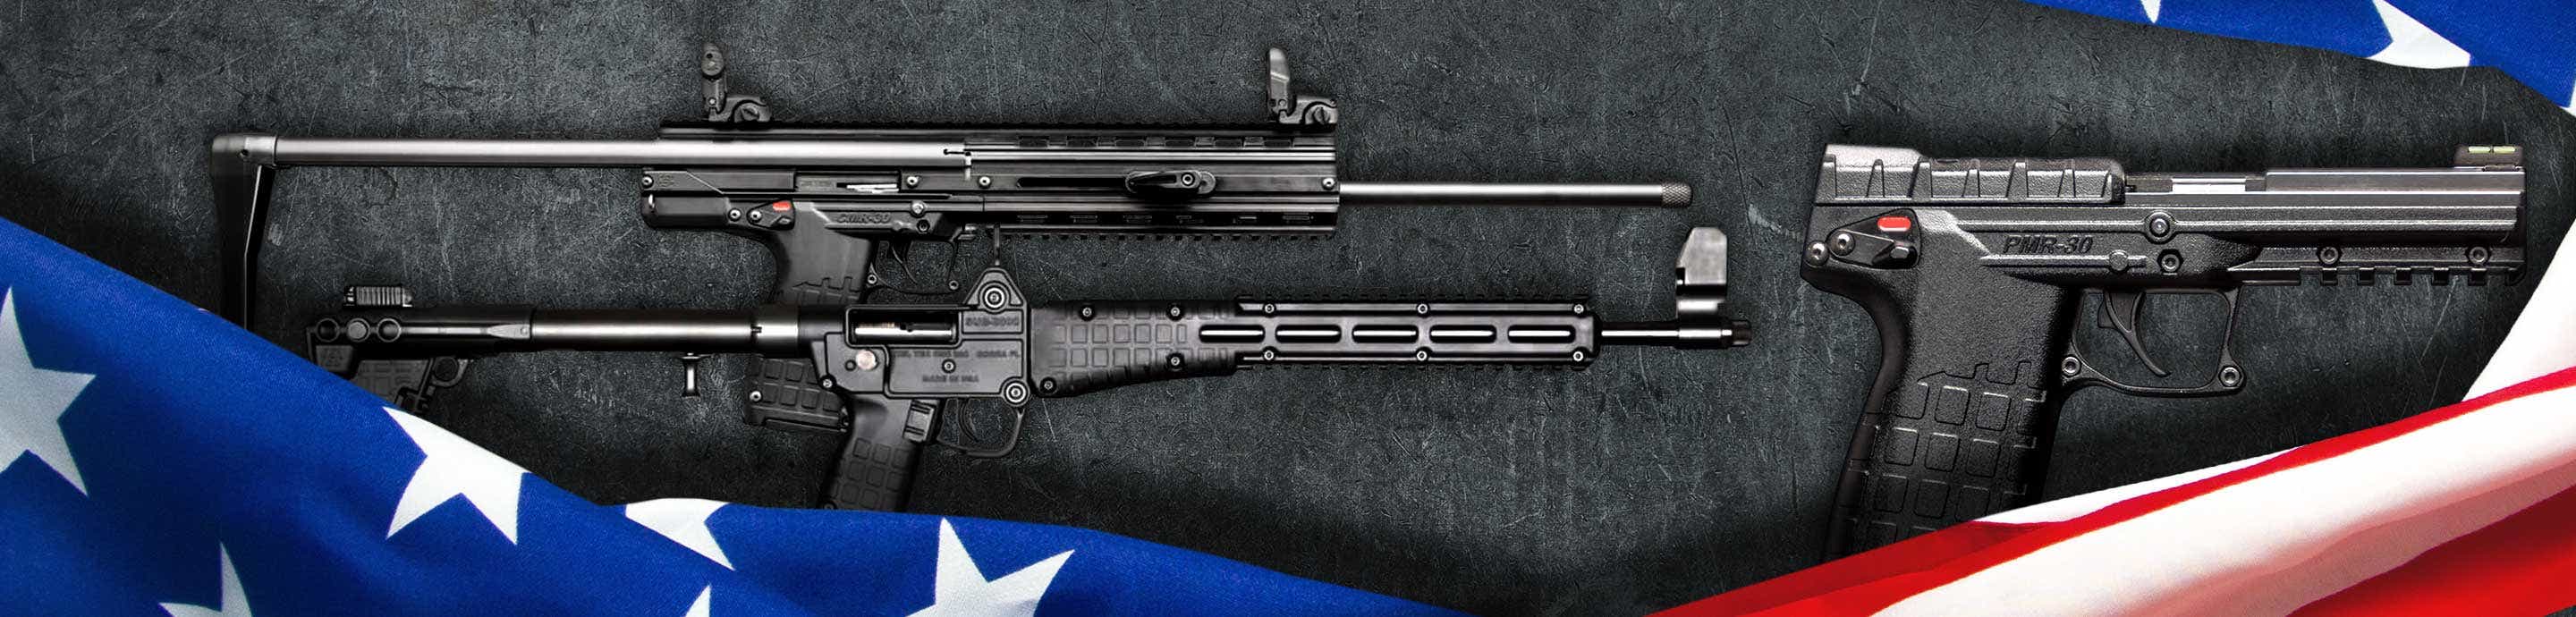
Back again with more mag news.

I found some step files (3d models) for a reverse engineered and then modified to 60 round CMR/PMR mag.

I've modified this version to remove the waffle pattern and a logo in the original and published it here if anyone is interested:


Follow the links and instructions as appropriate. If you look at the original authors profile you can see a quick making of video that is fun and basically saved me from doing the same thing with photogrammetry and tons of hours because my cad skills are still meh to the point that performing these mods where educational lol.

I've a print going now in PLA+ I'll report back what successes I have with what settings. I'm not super confident in the current print succeeding without supports but wanted to give it a go.

To be clear on expectations, I don't expect these to be durable, especially printed in PLA, I've already been given reports that the full sized mags work amazing, however the lips fail when the mags are stored with rounds.

First I don't care about this. It is less than $2 to print the body. If these work well even a few times it makes the economics of shooting it still quite affordable. I also have a 'mag cap' print I will be testing to clip onto the top of the mag to support the lips for storage that looks promising.

As an experiment I did a 'slim' version and got a quote of about $150 for a mag body printed in steel, quite pricy but it may be the most reliable over 30 round solution for the CMR and PMR in the end. I will experiment with other materials and processes as needed until I find something I like and convert my mag guts over. I may ultimately try to get one printed in steel...

If anyone else would like to print along and test please do and report back here.

You will need a spring and mag follower from another mag, I don't think OEM springs will work well though I'll report back. Apparently testing was done with 2 OEM mags, I am unsure how they where connected, though had considered silver soldering two together when I was looking at cutting and welding two OEM mags.
 
#2 · (Edited)
Okay some initial findings and a head ache so it will be a little bit before I can contribute further.

As this was an experimental print I was printing it with ends of spools and did a filament change mid print, long story short that messed up and I need to rip my printer apart to get some bits of filament out of some gears to fix some inconsistent extrusion now.

What did print looked great for the extended portion then not so great for the recessed portion.

Most of this being the seams are for more pronounced.

Another issue came to light and that is the print is about 0.4mm thicker on one side and 0.4mm thinner on the other!

I'll have to go back and adjust the model some more but it was getting down to 1 parameter in sections.

The fit of the mag was good, so was the strength. Impressively so. I may have been able to break it when inserted into he Maxwell, but I chickened out as I was afraid I might hurt myself if I tried harder and it did break!

While the plastic is definitely softer than the OEM mags I am confident in PLA working for the mag body, I still have reservations about the feed lips, but for function testing a better print / disposable use I'm feeling pretty good about it.

This was done at a 0.08mm layer height when I get back to printing I'm going to bump it up to 0.12mm. I will also lay it down some at a 35 degree angle and toss in supports on the underside.

The rational here being I think the too thin layer lines, along with short travel on each layer on top of very thin walls are making for a messy print / too much heat going where it isn't intended.

This conclusion is supported by the thiner side of the print having far worse seams. This layout will also give better structural integrity to the feed lips as they will not be stressed along the z-axis when mags are loaded.

I hope I can just thicken up the thin side and not take away from the tick side any for extra strength, fitting will decide in the end.

Definitely have your settings dialed in or have a nice printer before approaching this, it is somewhat of a challenging print, and will remain one even after the dimensions are corrected.

Looks good at least, even if it can't help with the bullets lol.

Image


Silly filament change messing my printer and print up... also see how bad the artifacts got on the thin side:
Image


I noticed the thin side in the print then inspected with the slicer... yup gotta fix the model to move forward:
Image
 
#3 · (Edited)
Good news bad news.

Good news is I have an updated step file published, just follow the original link. Things are a lot more symmetric now. Still not perfect but everything functional I could find was covered. I'll clean up more after some testing.

The thickness to the thin side was all added internally after taking some measurements off the resultant / failed print and an OEM mag. I also centered the back spine, it was off. In fact learning more about CAD and getting way more into the model file it was clear there were several artifacts likely from the machine generated code and the original authors attempt to patch things up. Clearly the top of the mag was scanned separately and then it was dropped onto a body scan. I read where he scarified a mag for the scan, I had assumed it was done vertically but guess not. I'm half tempted to redo it all from scratch to get rid of all of the artifacts. I think that may conclude my learning CAD 101 lol.

In total 0.6mm of material was added. This also made the mating to the top much cleaner.

Bad news is I'm out of PLA+ but in pink and the printer is still down needing a touch of maintenance. I'm thinking I might need a pink prototype mag before new filament shows lol.

MMMMmmmmm symmetrishness:

Image
 

Attachments

#5 ·
I feel like I’m posting into the wind here fellas.

I’ve come to the conclusion if you are here reading this you are in a distinct minority. This forum is de facto dead IMO.

If you are here and would like updates on this project find me as u/CMR30Modder on Reddit. Versions will be announced and posted to r/fosscad and r/keltech.

Managing my media and notes here no longer meets my threshold of worth the effort.

Release and development notes will be moved to the Odysee (linked in the first post)

So long and thanks for all the Keltec post!

If someone wants to pick up the mantle of posting updates here you have my blessing.
 
#7 ·
This looks very promising, and I'm impressed! During the summer, I'm usually on my boat, doing water things. Winter is my gun time, so I haven't been on the forums much at all. I'd really be interested in following this. I don't have a 3d printer (yet), but I do have friends that I can mooch prints off of. So I'll be following you on the alternate places.
 
#8 · (Edited)
Hey guys thanks for the feedback.

I've always kinda used TKOG as my primary source of getting and spreading my CMR infos but landed here as I was curious and looked at my traffic data and the differences are just insane. I'm reaching less than 0.01% of my views here... Actual engagement and comments are considerably higher than views here...

While I'm not actually concerned about stats so much, I had looked out of curiosity and to see how many others may be benefiting from the effort here and the raw numbers just told me I am wasting effort and need to reprioritize.

I'll still be lurker and still an occasional poster here. I'll still likely post here for milestones like pulling it out of beta / testing status. Just no more logging progress and primary post here but since I'm here on topic I'll give it one more go lol.

To comments that this won't work with consumer printer tech today, I feel I've spoken to the fact that I pretty much agree. I can still prototype at home and have printed commercially with an ITAR compliant service for a reasonable price, so can anyone else. I think a print in PC would work great here but am going to finish my design first as that isn't supper cheap as I can't do it at home lol also if that works good I'm likely getting one done in metal, there is at least one relatively inexpensive process that I can get these printed in metal on, but I have to research if it is actually suitable first as it requires annealing and that may present issues, however the model did pass automated issue detection for the process, whatever that is worth. Regardless as tech improves and gets cheaper this design will add even more value.

While longevity or designed use may be compromised I do believe you can still print at home today and use, especially when loaded under capacity and / or limited duration use. At least this is the impression I am getting with a few test prints I have now and subjugated to destructive testing. This is just my gut feeling for now.

As well there are many other unintended and intended uses like for the use in drilling reloads. I can print a $3 dummy version of my $50 PC printed mag and toss it on the ground all day and not really worry about it breaking and can print another one the same day if it does break badly.

So a quick project update while I am posting here:

I have went back and reverse engineered the mag body and plate retention lips, I've organized the project so the upper part of the mag / feed lips is still from the scan for future work though the entire rest of it had been sketched out and extruded so it is MUCH easer to work with and modify.

The mag body for the extended part is now much thinner reducing needed material, print time, and therefor cost especially when using commercial services and engineering materials, I will also be publishing one where the extension has no extra material for use in SLS metal printers for the same reasons.

I did a few printed test samples in PLA+ playing around with orientation and without thickening up the lips some (I think there is a little play here but not going to worry about it for now) there really isn't much of a difference I could tell by testing failure by hand but I feel like 90 degrees is actually a bit stronger where it counts. While I've done 45, 90, and 180 degrees vertical orientation test the 45 was in a different material so still waiting on my printer to figure out the best orientation for sure.

Been busy on other stuff and hit a natural stopping point when I realized I sketched the mag interior mirrored so the follower doesn't sit right lol.

So when I pick things back up I'll correct the mag internally and release again. The mag plate will be published in the next release as well as it needed redesigned to fit the smaller footprint on the new design. I'll probably do a a photogrammetry scan of the follower (at least at first) and include a spring source for a complete mag option when 100% done, but just found out you can buy the mag followers and springs on the PMR30 parts page so that is always an option as well.

I was still having some hot end issues I'm waiting on parts for when printing these samples, but here they are anyhow, cute little process test mags for your enjoyment lol:


Image


Here is my first printed one (v1.2) done in PETG. After printing became clear the model length needs an extra 10mm or so for 60 rounds proper 59 here. The desire to lengthen is also what prompted the redesign / reverse engineering as the scanned file was a mess to work with:

Image
 
#9 ·
Sorry, but I (as well as many others apparently) don't share your zeal for expanding the already plentiful 30 round magazines. My 12 30 round magazines will do me as far into the zombie apocalypse as I will probably make it anyway. I don't care for magazines that protrude 6 or so inches below my grip (on a pistol anyway). I don't mind the 33 round Glock mag on my S2K, but once again, when I reach 30 round capacity on a firearm I'm good to go.
 
#13 · (Edited)
@RDTCU been going to town testing various filaments doing destructive testing etc.

I am currently testing with Siraya Tech PAHT-CF it is PPA based. Using Glock mags as a benchmark. So far this is the best I've tested being able to have a 33 round high power spring in a 25 round mag body fully loaded with 25 rounds I was able to toss it around a bunch culminating in a spinning toss about 7ft high before the lip cracked. It still held the rounds and still functioned even with the cracked lip, in fact some force is even needed to separate the crack enough to see clearly. I went back and testing more settings and was able to get a bunch more strength out of this filament. I'm optimistic about this filament being viable now for these mags.

Worst case scenario there is Bambu Labs PPA-CF though at well over double the price @ $200 a kilo you gotta dig into the TDS papers and compare themto appreciate how much better of a PPA filament it is... on paper it is delivering nearly 50% additional impact strength... All the specs get a nice bump frankly. I'm going to pick up at least one roll for testing because I just have to see the difference and it may actually be necessary for any type of durability of the mag. Given the thin mag lips on the xMR mags there is a a good chance it may be warranted.

While the PA-12 you picked out may work out for a bit, due to it being softer and more prone to deforming under strain especially after moisture absorption I do not believe it would be a viable option per my testing results so far. Layer adhesion is going to like be an issue as well.

If you have other arms / FOSSCAD aspirations I suggest you check out PPA-CF over PA 6 & 12 and their alloys. Hoffman Tactical released a compelling report recently that kinda poo poos over the PAs mostly due to their flex and creep over time.

I'm hopping I can get away with most things I want to print being in the ST PPA @ $70 a roll then using the BL @ $150 a 750g roll where that extra strength counts.

I should have results from my ST PPA CMR mag testing in a few day if all goes well with existing prints.
 
#15 ·
Back to pending status.

Testing inconclusive.

Hand feel on the print bending feed lips and squeezing the mag sides first indicated an overall improvement to dimensional stability to OEM mags... it was impressive.

However this was done at a slightly lower tempt to improve overhang quality... while it wasn't actually needed for this print I was going with this process. Initial testing showed the same strength as the higher temp 310 vs. 320c.

Additional testing has shown that this was an anomaly. The feed lips cracked during hand loading due to a bit more post processing needed on the underside of the lips and me thinking the additional force needed was just going to help post process via use.

I still have hopes for viability with a printed mag, but need to ensure the layer bonding strength is as best as it can get. And I'm less inclined to believe this filament is the answer here but that is a gut feeling.

Siraya Tech makes a PPA-CF core product where a PPA sheath surrounds the PPA-CF blended core. This is supposed to dramatically increase layer bonding allowing the polymers to better melt together without the CF interfering and may be the key. While $100/kg it is still cheaper than the BL bespoke PPA-CF I'm trying not to use lol.

I will reprint in on another axis / angle as well after ensuring my profile is providing maximum strength however I think the required amount of post work to fix the internals to a smooth state may be very difficult due to the long narrow mag.

This will probably take at least a few more weeks as I have a busy print schedule for another project and was fitting this effort in while waiting on some parts and equipment.

Image
 
#16 ·
Thanks for all the feedback. I've got a sealed spool of Bambu PAHT-CF for gun stuff, still learning the ropes on the X1C but ive had it running at least every other day with trinkets for the kids, craft stuff for the wife etc. My first gun thing was a short proof of concept mag to test stacking of 300blk at a steep angle... This is the ultimate goal:

Image
 
#18 ·
Thanks for the appreciation!

Just to update everyone, this is back on indefinite pause.

I will eventually order some unfilled PPA, and the Bambu Labs CF filled stuff and will do more testing... I am actually thinking the straight PPA may be quite viable after lookin at the TDS, those lips really need strong layer bonds... and I think straight PPA may work and help feeding without the rough CF texture as well. There is a lot of guess work here as I don't have any data to compare against OEM mags to make informed determinations or even directly comparable data between filaments. Nor sophisticated testing procedures... I basically just print samples and bend them at the same time and see how they behave and when they break.... works for understanding the differences in a practical manner.... but makes it difficult to accurately anticipate results.

I have a feeling that is growing that the only reliable way to 50+ rounds is going to be a parametric model where you take measurements with calipers then plug in the values per mag for a mag extension... this is assuming I can't find a filament that will work for the mag lips in a fully printed mag. On the bright side this method would allow a wider range of filaments to be used and the model will be more easily printed.

Overall my optimism has faded here but I'm not giving up just yet. I still have some hope for a fully printed version but it is definitely at the edge of what prosumer printers can deliver today if it is possible. In the end it will have a very restrictive process to print due to this. These are not Glock 19 mags lol.

There is always additional hope with new filaments exhibiting cool properties dropping fairly consistently these days, but I've only so much money and time I'm willing to spend on this hobby project.